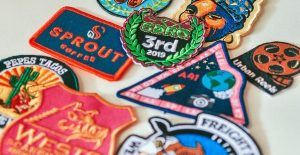
Custom sew on patches serve as bold identification displays on uniforms, wearable keepsakes from your travels, and are unique additions to your outfit for a dash of personal style. But the fun doesn’t start only when wearing them, custom patches are also fun to make!

Here are ten tips to help you create effective and eye-catching custom sew on patches:
1. Simplicity is Key: Keep your design simple and easily recognizable. Remember that patches are often small, so intricate details may not translate well. Opt for clean lines and bold shapes. A simple, well-executed design is more likely to be effective and visually appealing.
2. Consider Color Contrast: Choose colors that contrast well with the background material. This ensures that your design stands out and is easily visible from a distance. If your patch will be placed on a uniform or clothing, consider the color of the fabric it will be sewn onto as well.
3. Choose Meaningful Symbols and Text: Think carefully about the symbols, images, or text you want to include in your patch. They should have significance and relevance to the purpose or message you want to convey. Avoid cluttering the patch with too much text or too many elements; it should be easily understood at a glance.
4. Test Your Design: Before finalizing your design, consider creating a mock-up or a digital proof. This can help you visualize how the patch will look and make any necessary adjustments. Pay attention to the size and placement of elements within your design.
5. Work with a Professional Graphic Designer: If you’re not confident in your design skills, consider hiring a professional graphic designer. They can help you create a polished and professional-looking patch that meets your specifications. A skilled designer will also be familiar with the technical requirements for patch production.
6. Think About Stitching Complexity: Depending on your design, you’ll need to consider the complexity of the stitching required. Intricate designs with numerous small details may be challenging to reproduce accurately through stitching. Discuss this with your patch manufacturer to determine if your design is feasible and if any adjustments are needed.
7. Choose the Right Patch Size and Shape: The size and shape of your patch should complement your design. Consider the proportions of your artwork when selecting the patch dimensions. Some shapes, such as circles or rectangles, are more common, but custom shapes can add uniqueness to your patch.
8. Consider Patch Backing and Attachment: Think about how your patch will be attached to clothing or other surfaces. Sew-on patches are versatile, but you might also consider iron-on or Velcro backing for convenience. Discuss these options with your manufacturer.
9. Quality is Essential: Quality matters when it comes to patches. Ensure that your design and the materials used will result in a durable and long-lasting patch. A well-made patch will maintain its appearance over time.
10. Get Feedback: Before finalizing your design, get feedback from others. Ask friends, colleagues, or potential users of the patches for their opinions. This can provide valuable insights and help you refine your design.
Once you’ve designed your custom sew on patches, work closely with a reputable patch manufacturer to turn your vision into reality. They can guide technical details and ensure that your patches are produced to the highest quality standards.
We can help you create your custom sew on patches, but we leave the fun part in your hands. Our embroidered patch maker will let your creativity flow in designing unique patches and we will be giving you a free custom patch mockup to review your creation.
For other custom items, visit our partner stores: lapels.com.au, corporatetie.com.au, corporatekeyrings.com.au, custombeltbuckles.com.au, and customcufflinks.com.au.

